
Pilanesberg is widely known as South Africa’s most popular game reserve, and not without good cause. Its abundance of wildlife and birdlife, stunning landscapes and great hides mean it’s also a great place for avid amateur photographers to get to grips with wildlife photography.
If you too are eager to capture this great park and its inhabitants on camera, here are a few basic tips to help you get safari snaps that will be the envy of your friends and family:
Light is always important
If you hang out with wildlife photographers you’ll notice that they spend an awful lot of time talking about the light. Softer light generally makes for much richer and more detailed images. Early morning and late afternoon/evening are unanimously considered the best times for safari photography. The latter is often referred to as “the golden hour”.
In the middle of the day the light is much harsher and this means your images will lose a lot of vibrance and contrast – far too much white light. Also worth noting is that harsher light generally goes hand in hand with the hottest parts of the day, which can mean less active wildlife and, therefore, less interesting shots.
Another important consideration with regards to lighting is the angle of the sun. It’s generally advised to shoot with the sun behind you, as this gives more detail to your subject. If you shoot with the sun staring you in the face you will generally get too much glare, or too many shadows, and either way you’ll probably lose a lot of detail.
Composition and perspective
Putting your image subject in the centre of your image frame might seem like the most logical thing to do, but it’s generally not very creative or appealing to the eye.
A good place to start when it comes to being more thoughtful about your composition is the ‘Rule of Thirds’. Now try to position your main subject off centre in the foreground, as with the image below. This method can encourage more of a sense of depth as well as interaction with the rest of the image too, if there are other points of interest or a pretty backdrop say.
If taking landscape shots, the ‘Rule of Thirds’ is just as useful for positioning your horizon or any particular features that stand out.
If you want to get more creative, it’s also fun to play around with angle and perspective. Don’t take all your shots from the same sitting position in your safari vehicle or at eye level – try to mix it up when possible. A Pilanesberg guided bush walk gives you a great opportunity to get lower to the ground, crouching on your knees for example, and create more imposing subjects.
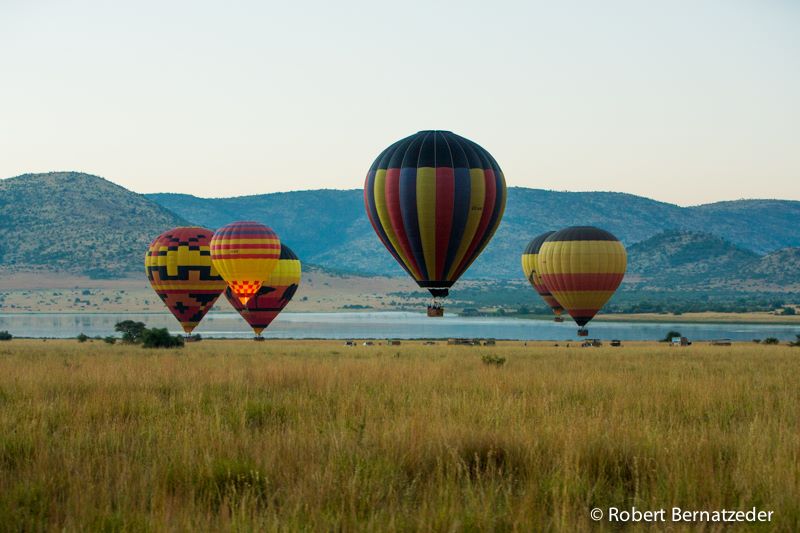
Or for a really special perspective, book a hot air balloon ride and photograph the park from above.
Watch your shutter speed
Many of the best wildlife or birdlife shots are action shots, where the subject or subjects are moving rather than sitting still.
But it can be hard to predict an animal’s or bird’s movements, and you might not have much of a window of time to catch a great action shot. To help ensure that you don’t miss out on an opportunity by taking images that are not pin sharp, you need to keep your shutter speed high.
The general rule is that your shutter speed should always be at least twice your lens focal length. So if you are shooting with a 100 – 400mm lens, for example, your shutter speed should always be 1/800 or above. If shooting birds, look to push your shutter speed up to 1/2500.
Make use of the hides
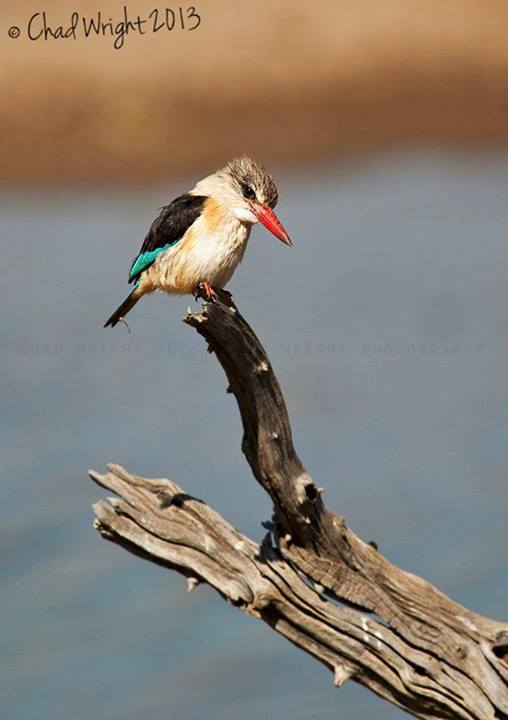
Pilanesberg has some excellent hides which are perfect locations to settle in for a while and quietly wait for the action, whether that’s a herd of elephants coming to drink, hippos fighting for territory in the water or rare bird species such as the malachite kingfisher doing a spot of fishing.
All of Pilanesberg’s hides are unobtrusive, well-maintained, fenced for safety and equipped with toilet facilities.
The west-facing Rathogo hide has good light for photography in the morning, while the east-facing Ruighoek and Malatse are better in the afternoons. North-facing Makorwane and Batlhako are better suited to low light photography on cloudy days.
The Mankwe hide is the most popular hide in the park and offers the most picturesque backdrops to your images. This hide juts out into the middle of the large Mankwe Dam and its C shape allows photographers to shoot both east and west depending on the light. This is probably the best hide to spot hippos, crocodiles and the elusive malachite kingfisher, and the dead trees in the foreground of the view across this watery expanse add an interesting prop to your images.
Don’t be afraid to experiment
While it’s sometimes good to play by hard and fast wildlife photography rules, as you get more confident it can also be a whole lot of fun breaking them.
Get to know your camera and its capabilities intimately, play around with its settings; overexpose, underexpose; slow down your shutter speed with a fast-moving subject and see what happens; zoom in as far as you can on a specific part of your subject, as below.
If we all stick to the same rules all the time, all our images are going to look more or less alike. Don’t be afraid to be original.